💭 Before You Start: Mindset Matters
Caring for your curls starts with two key ingredients that no product can provide:
💖 1. Love Your Texture
This is your foundation. Your hair is not a problem to fix. It’s a natural extension of who you are — from loose waves to tight coils, each strand deserves patience, not pressure.
Embracing your curls means unlearning Eurocentric beauty ideals and letting go of the need to “tame” your texture. Your curls are not difficult — they’re different. They require understanding, not control.
🕊️ 2. Practice Patience
Hair grows about ½ inch per month — and length retention takes time, especially with textured hair that is naturally drier and more fragile. There are no miracle shortcuts. Products support health, but consistency is what gets you results.
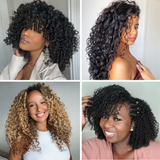
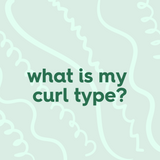
🔎 Step 1: Know Your Curl Pattern & Porosity
Knowing your hair type helps you understand what it needs. Curls are generally classified into:
Curl Pattern (Shape)
-
Type 2 (Wavy): S-shaped waves, less prone to dryness
-
Type 3 (Curly): Spirals with bounce and body
-
Type 4 (Coily/Kinky): Tight coils, prone to shrinkage and dryness
Each type is further split into A, B, or C based on curl diameter. Tighter curls (especially Type 4) are usually drier and more fragile, so they need more moisture and gentle handling. Check out our curl type guide to learn more.
💧 Step 2a: Moisture is Everything
Curls thrive on moisture. Moisture is what keeps curls soft, elastic, and breakage-free. Because sebum (the scalp's natural oil) has trouble traveling down textured strands, our ends often stay dry and prone to splitting.
When your hair is dry, it becomes brittle, prone to breakage, and harder to detangle or style.
Why Curly Hair is Drier:
-
Sebum (your scalp’s natural oil) has a harder time traveling down curved strands
-
Coils have more surface area and gaps, which increases moisture loss
-
Everyday friction (from styling, sleeping, or weather) lifts the cuticle and leads to dryness
Key Signs of Dehydrated Hair:
🧴 Step 2b: Moisturise Effectively
This layering technique (LOC Method) helps your curls to retain moisture over a longer period of time. It’s especially useful for Type 3 and Type 4 hair, which lose moisture quickly.
Use the LOC or LCO Method:
-
L = Liquid: Start with water or a water-based leave-in spray. This hydrates.
-
O = Oil: Apply a sealing oil (like jojoba or avocado). This locks in moisture.
-
C = Cream: Finish with a curl cream or butter for styling and protection.
💡 LCO is often better for low-porosity hair, as cream helps moisture penetrate before sealing it in.
🛠️ Product Layering Tips:
-
Don’t overload hair with heavy butters if you have fine strands
-
Use aloe vera, glycerin, or panthenol-rich products for added hydration
-
Humectants (like honey or agave) are great in humid climates — but beware in dry climates, where they can draw moisture out of the hair
-
Adjust your moisture routine seasonally—more moisture during dry or windy weather is essential.
📋 Key Tip: Focus on the ends and moisturise consistently. Reapply every 2–3 days or as needed.
Learn the difference between moisture and hydration here.
🌿 Step 3: Use Curl-Conscious Ingredients
Textured hair is sensitive to ingredients. Many conventional products contain film-forming or drying agents that block hydration or cause buildup.
What to avoid:
-
Ingredients ending in -fate (Sulfates)
-
Drying alcohols (Alcohol Denat., Ethanol)
-
Silicones (Dimethicone, Cyclopentasiloxane): Coats hair and prevents moisture
-
Petroleum/Mineral Oil: Occlusive and blocks hydration
What to look for:
-
Botanical oils: Coconut, avocado, grapeseed, almond
-
Butters: Shea, mango, cocoa
-
Humectants: Glycerin, aloe vera, honey
-
Plant extracts: Marshmallow root, slippery elm, hibiscus
📋 Key Tip: Always read ingredient labels. "Natural" doesn't always mean safe for curls. "Natural" is unregulated in cosmetics, so always check the full ingredient list before buying.
🪮 Step 4: Detangle Gently and Work in Sections
Curls tangle easily, especially when dry or product-heavy. Improper detangling leads to unnecessary breakage.
This is why it's important to always work in sections while cleansing, detangling, styling your hair, especially for thick or tightly coiled hair. Sectioning makes everything easier and less stressful.
Detangling Best Practices:
-
Always detangle on damp or wet hair with conditioner or a detangling spray. I personally prefer damp hair as my curls are more stretched and elongated, which means it's easier to release shed hair.
-
Try to begin with fingers first, before proceeding to detangle with a wide-tooth comb
-
Section hair into 4–8 parts to make it manageable
- Start at the ends and work toward the roots. To avoid discomfort by pulling at the scalp, always hold a section of hair strands taught before combing the ends.
📋 Key Tip #1: Never detangle dry hair — this damages the curl pattern and causes breakage.
📋 Key Tip #2: It's better to start combing from the tips of your hair working up to the roots. Never start combing and detangling from the roots. By starting at the tips, you are releasing shed hair that usually gets entangled downward. It might take some extra time to detangle carefully, but the direction of combing is oh-so worth the reduced breakage. Applying a slippery and nourishing detangler like the Rose Water Detangling Lotion assists in reducing breakage.
📋 Key Tip #3: If you have the ‘’hands-in-hair’’ problem, try to keep (anyone's) hands out of your hair apart from when it’s wash day or when you are styling your hair. We know that the temptation and boredom is real, but low manipulation is key to minimising breakage!
🌸 Step 5: Protect Your Ends
Your ends are the oldest, driest part of your hair. Protective styles—like buns, twists, cornrows, or halo braids—keep ends tucked away from friction, weather, and over-manipulation.
They’re also a great way to change up your look while promoting length retention.
Styles like braids, twists, cornrows, and buns:
-
Reduce manipulation
-
Protect ends
-
Preserve moisture
✅ Best protective styles:
📋 Key Tip: Keep them in for no more than 4–6 weeks, and refresh your scalp and moisturise weekly.
🛏️ Step 6: Protect Your Hair at Night
Nighttime is when most moisture loss and breakage happens due to friction and cotton pillowcases.
Protect with:
-
A satin or silk bonnet
-
Pineapple your hair: loosely tie it in a high puff to preserve curls
-
Braids, twists, or plaits to reduce tangling
📋 Key Tip: Nighttime protection keeps your style intact longer — saving time on refreshing.
✂️ Step 7: Trim Properly
Trimming removes split ends before they lead to breakage and keeps your curls bouncy and uniform.
-
Trim every 3–6 months, depending on your style and health of ends
-
Use curly hair-trained stylists who cut dry if you wear your hair curly
-
DIY? Put hair in mini twists or braids, and snip off frayed ends
Signs you need a trim:
Contrary to popular thought, split ends can never be repaired. The only real cure for split ends is trimming them off. When you have split ends and you don't cut them, they will continue to split all the way up to the hair root, which can stunt length retention.
Tip #1: Apply an oil to your ends regularly to keep them protected. Our Citrus Superfruit Radiance Oil helps to protect your hair from the elements.
📋 Key Tip #2: Looking for curly hair salons? Use Google or ask your curly-haired friends for recommendations of experienced persons/salons in your local area. You want to avoid getting a bad cut or experience from a stylist who is not experienced with your particular texture. Ask them for a consultation and review their product options. Bring your own products if you prefer, to give you more control about what you put on your hair.
🔥 Step 8: Limit Heat and Harsh Styling
Blow drying, flat ironing, and even frequent diffusing can break down the protein structure of your curls and cause heat damage, which is often irreversible.
If you use heat:
-
Only on clean, conditioned hair
-
Use a silicone-free heat protectant
-
Keep tools under 300–350°F (150–175°C)
-
Avoid straightening more than once every 2–3 months
Opt for air drying or low-heat diffusing with a curl-friendly leave-in or mousse.
🚿 Step 9: Cleanse
Cleansing removes buildup, which can block moisture. But overwashing can strip your hair’s protective oils.
Your wash routine depends on:
-
Hair type and porosity
-
Product usage (especially gels, oils, and butters)
-
Scalp health (itchiness, flakes, or buildup)
A basic washday routine:
-
Pre-poo (as needed): Apply an oil to dry hair to prevent stripping
-
Detangle (as needed): Use a slippery detangling lotion either before cleansing or after conditioning
-
Cleanse (every 1-2 weeks): Use a sulfate-free shampoo
-
Condition (every 1-2 weeks): Use a nourishing rinse-out conditioner
-
Deep condition or treat (every 4-6 weeks): With an intensive conditioning treatment
-
Style (Daily or as needed): Apply a lotion, gel, braid cream or foam or choose one of our handy styling trio kits.
📋 Key Tip #1: Wash every 7–10 days or as needed. More often if you sweat a lot, less if you wear protective styles.
📋 Key Tip #2: Conventional cotton towels and their fibres are known for causing frizz and friction and absorbing too much moisture. Opt for a t-shirt or microfibre towel which is design to be ultra soft and gentle on all curl types. Gently blot, squeeze or pat excess water from your hair to minimise frizz.
🧘🏽♀️ Step 10: Support Hair Growth Internally
Curls grow from within. Your diet, stress levels, and hydration habits affect your strands more than you think.
Wellness tips:
-
Drink at least 2 liters (8 cups) of water daily
-
Eat a balanced diet rich in:
-
Protein (hair is made of keratin)
-
Iron & Zinc (supports follicle health)
-
Omega-3s (promotes shine and scalp moisture)
-
Vitamins A, C, D, and E (boost growth and protect follicles)
-
Get regular movement, sunlight, and rest
-
Reduce chronic stress and protect your peace — cortisol can trigger shedding
💬 Final Thoughts: It’s a Journey, Not a Destination
Your curl journey is personal, evolving, and deeply rewarding. Every frizz, tangle, and breakthrough is part of the process. Let go of comparison. Focus on health, not length. Celebrate softness, not “perfection.”
You don’t have to get it all right immediately. What matters is showing up with intentional care for your curls.
Want More Tips?
We’re here for you! Email us at hello@floracurl.com or explore more on our blog.
📚 Recommended Reads:
-
The Science of Black Hair: A Comprehensive Guide to Textured Hair Care by Audrey Davis-Sivasothy
-
The Science of Transitioning: A Complete Guide to Hair Care for Transitioners and New Naturals by Audrey Davis-Sivasothy
I hope that you have found this guide that I have written useful!
With love,
Rose
Founder, Flora & Curl Haircare